
I've been having fun with knitting stockings recently, and so when I spotted these knitted silk garters I just knew that had to be added to my "must have" list.
Then, along came the Lochac largesse swap project - which is kind of like "secret santa" where a bunch of people join, and each of them gets the name of another person to make a present for within a certain timeperiod.
I figured it was the perfect excuse, and began planning.
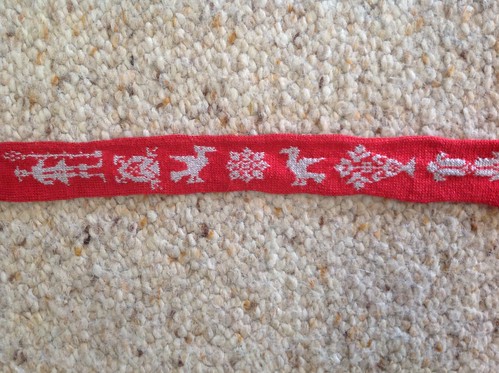
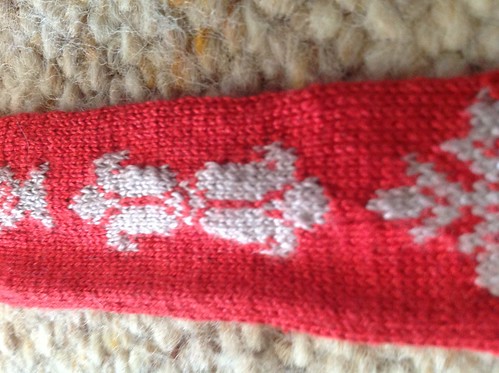
Closeup of the red garter
Materials
Medieval Silkwork has an article on some publications of the York Archaeological Trust that includes a scanned page from the book "The archeology of York" - which shows three bent, extant metal knitting needles (copper alloy) found in the archaeological layer measured to be from the late 14th century.
The rods are between 1.9mm and 2.6mm wide, showing that metal needles of quite a fine gauge were in use at the time.
The garters above are knitted in fine silk. I sourced my silk from Handweavers studio in London. The silk is "30/2" weight - which I chose by the process outlined below.
The original piece is measured at 4cm wide (presumably at the wider sections), and looking closely I counted the numbers of columns of stitching. The widest motif was 23 columns of stitches wide, and I estimated 2-3 columns of stitching on either side of that, making around 27 stitches for 4cm of width.
I knitted up four test swatches using the smallest needles I had (1.25mm and 1.5mm) and two weights of silk... and decided that the closest match to the look of the original piece was the 1.25mm needles (size 0000 in US needles) with the "30/2" weight silk.
The original piece was in dark red and cream... but the recipient of my largesse piece had arms in red and silver - thus why I chose the alternative colours.
The original piece had both garters knitted in the same colour-scheme (red with white patterning)... but I didn't have quite enough of the red silk to do two garters that way (it took a *lot* of silk), so I particoloured, in order to finish them both without running out of thread.
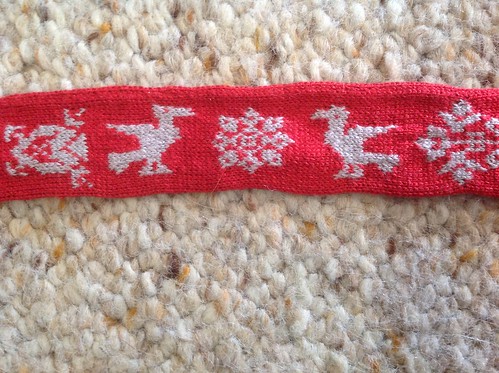
Closeup of the two-birds motif
Charting the patterns
First step was to pains-takingly chart each of the patterns. This was accomplished with a zoom closeup of the originals and some graph-paper... They're on the flickr album (see last section).
Some of the patterns repeat, and I noticed that some of the "same" motifs had very slight variations of each other. I have no way of telling if these were actual differences in patterning, or if they are simply repairs or if the stitching has pulled in ways as to make it seem different... either way I picked one variant that I liked for each and used them consistently in my own knitting.
I noticed that in the narrow "tie" sections, the patterning is consistent (diamond-triangle-grid-diamond-flower) on *most* of the ties... but not all. I didn't notice that myself until after I'd started knitting my first tie (and got the variation slightly different on that one)... so at least my inconsistency is somewhat consistent with the original inconsistency there ;)
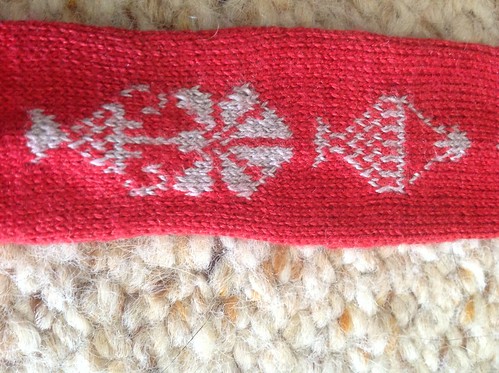
Flower-vase and chalice motif
Knitting...
In the picture, the garters are clearly double-sided (the patterns are equally on both sides). However they're also incredibly flat. I looked closely, and to the best of my ability to zoom-in they appear to be stocking-stitch on *both* sides (the "straight" edges of all the knitted motifs have v-shapes on *both* sides of the knitting - which is only every found on the stocking-stitch side of knitting, not the perl-side). I really wasn't sure how to achieve this effect easily without doing circular knitting, or doing the patterns twice and stitching them together.
It's plausible that the stocking-stitch assumption is incorrect - that it's actually knitted in garter-stitch but the picture is too poor a quality to accurately reflect what it looks like. It's also plausible, that the pattern-motifs *aren't* knitted-in via intaglio, but were actually embroidered on afterwards... in any case - I chose to knit the patterns in. Partly because it would be more fun.
I decided not to drive myself crazy(er?) and knit with circular knitting - but to knit it flat then stitch it up afterwards. This meant that it doesn't sit as nicely flat due to one side having a seam... but was *much* quicker to knit.
I knitted an average of an hour per day for six months in order to finish the garter - for a total of about 200 hours of work (including finishing). I woefully underestimated how much work was involved in these - and TBH, I'm glad I did or I'd have never started this project... and I'm glad I did. it took so much time because - even though the garters are very narrow... they are 27 stitches wide... and double sides, making 54 stitches per row... and they are 165cm long... which is roughly 1113 rows. And there's two of the garters.
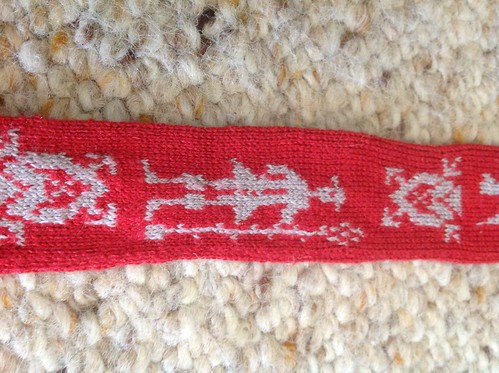
Little man with either a spear, or maybe a tall, narrow tree - there was one of these at the very centre of each garter.
Finishing
Seans
I joined the seam with an invisible seam technique that I leartn when I was a kid, but which I googled and you can find an article here where it's called mattress stitch. This meant that even though it doesn't quite sit flat - you can't really *see* the seam from the outside, and it looks just like it was knitted in the round.
Fleurs-de-lys motif... and here you can see the seam a bit (bottom edge)
Tassles
The final piece was the tassles. These were easy to make... I was going to use a simple four-part braid for the thread holding each one on, but on closer inspection of the originals, I noticed that the colours were vertical stripes... so in the end I used a simple kumihimo technique (doing it freehand) where you simply swap the alternate colours, but one pair goes clockwise, and the other anti-clockwise, thus twining each around the other, and locking the other into place. This looked identical to the originals, so I assume it's what they used.
the one thing I didn't do like the originals was use an embroidered bead between the ends of the garters and the set of tassles... something that I think would have greatly improved the look of the garter's ends - which otherwise look a bit stumpy to me.... ah well.
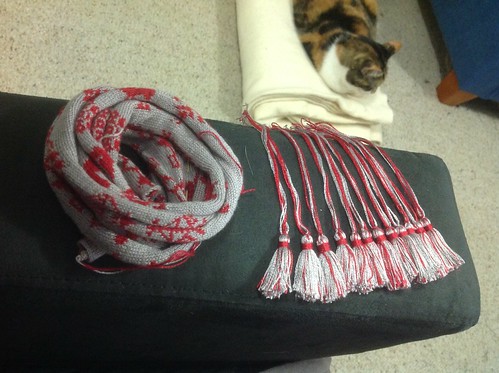
tassle-making... and helpful cat
What I'd do differently
I didn't leave enough seam-allowance in order for the garters to look balanced - especially in the narrowly-defined section that increases from the ties to the wider parts. I left only 2 extra stitches, which seemed like a lot during the knitting, but didn't quite stretch over the extra width of the seam. Technically I only needed one stitch to be stitched into the seam, but the bend of the knitted fabric around the seam caused some extra in-drawing of the fabric. An extra stitch would have made the two sides *look* more even.
If I were to do this again, I'd figure out how to make the embroidery-covered beads to make the ends look less like they just... end.
Really, I'd like to actually go to Boston and look at the originals and see how they were really made. Check my assumptions and fix any errors there.I'd especially like to see how they were really made flat - whether the motifs were actually knitted-in at all.
More pics... and patterns
For more pics, I have set up a knitted garters album on flickr. I'll keep adding my pics there as I get around to uploading them.
The album includes photos of the graphed patterns of the motifs (not prettified, just raw).
Sadly, I no longer have the garters in my possession. They were given to Janet Coath as her largesse project. I'd love to see pictures of her wearing them!
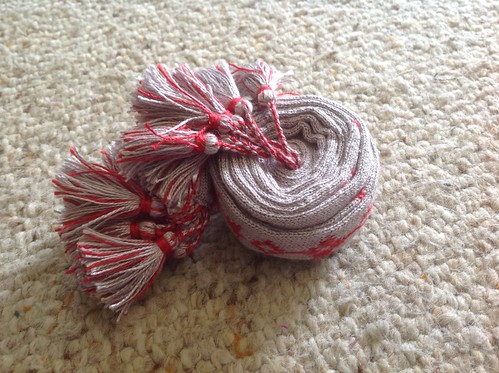
Completed silver garter


!["then add [the spices] and boyle them one quarter of an hour longer"](https://lh3.googleusercontent.com/blogger_img_proxy/AEn0k_sQGwrHsmrdo9iStun-c3cB2vFe-lRMxg1WdqeGqstKNjXaNWBUS-518O-yRYIqWRR5Dv3Q9NhYCItznbR6QMzSueXIJtR_Ure7mxrkR6r7WxYu-0OGMb6awh0sbvpngpc=s0-d)
!["take [lemmons] and put them in a vessel ... take the liquor boyling...& pour it into the vessel"](https://lh3.googleusercontent.com/blogger_img_proxy/AEn0k_ugl6stFht5LODFFy3OyPww8BZwRaE-jNAy7e9uSX08eYdu2uV_XVfNZILB-61emExqwimwDJyffMuW7Oj5njlT8OPrxwgQXa_cY_mEIpaCC3s9eKUTDIhUf1R5G2SVlwts=s0-d)
