Sunday 24 February 2013

"lemmon mead"

I've been making a lot of home-brew wines in preparation for festival. Over the next indefinite-time-period I'll put them all up here as tutorials. To start with, though, here is the one I put on just this weekend.

I've been making home-brew wines for quite some time now, but my speciality is in meads - which are wines made from honey instead of grapes. So I quite like to try new mead recipes.

This one piqued my interest because it not only has "lemmons", but rosemary and ginger and a little spice - so it looks set to become quite a tasty brew. It's also made with a ratio of honey-water that puts it fairly within my preferred sweetness-range.

Recipe

"lemmon mead" recipe

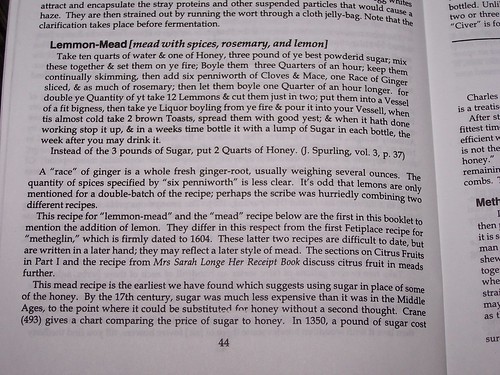
The recipe comes originally from the "Complete Receipt Book of Ladie Elynor Fettiplace", but I have the redaction from Compleat Anachronist #120.

What I did

ingredients

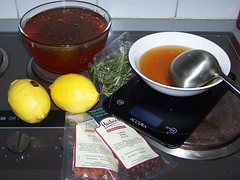
Ingredients for ~1 gallon batch:

  • 1.7 kg honey
  • water as needed
  • 2 lemons
  • 2 lumps of ginger
  • 4 cloves
  • 2 blades of mace
  • 1 stick of fresh rosemary
  • Ale yeast

I guesstimated the amounts for all these based on the ratios in the recipe, and my own personal experience and taste.

Equipment:

A heavy-bottomed-pot - it will need to be about a gallon and a bit in size.

A heat-resistant spoon

A few bowls

A primary-fermentation container of some kind. It must be big enough to hold a bit over a gallon of liquid and have a lid that can be closed almost-completely. I use a giant tupperware container and close it up except for one corner.

A "proper" fermentation vessel - eg a 1 gallon carboy and fitted airlock. You can get this at your local brewing shop

Step 1: "take... water and honey... and set them on ye fyre"

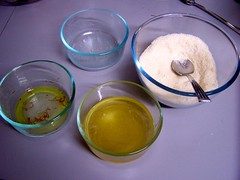
Put the honey into the pot. Add about 3 litres of water and stir them well together. It'll look quite cloudy.

Turn the heat onto medium and let it begin to heat up.

Set a timer for 45minutes, or just mark the time on the clock and keep an eye on it.

Meanwhile...

Step 2: "take... six penniworth of cloves & mace, one race of ginger and as much of rosemary"

"six penniworth of cloves and mace... and as much of rosemary"

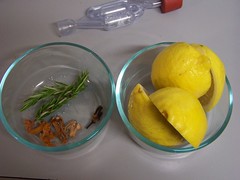
Prep your spices. Take your ginger and slice it reasonably thinly. Put aside the cloves and mace, and rinse the rosemary.

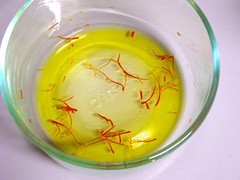
You might as well cut your lemons in two while you're at it.

You should also start your yeast now by putting into a warm cup of water.

Meanwhile, back at the farm..

Step 3: "...keep them continually skimming"

"keep them continually skimming"

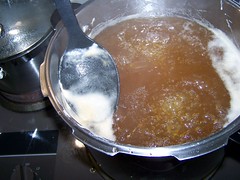
By now, the honey-water will be boiling. Keep it to a simmer, and skim the scum that riseth - tipping it out into a bowl.

Step 4: "then add [the spices] and boyle them one quarter of an hour longer"

"then add [the spices] and boyle them one quarter of an hour longer"

Once you've boiled and skimmed for 45min, drop the spices and ginger into the pot and let it boil for another quarter of an hour.

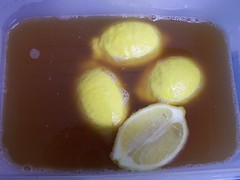
Step 5: "take [the lemmons] and put them into a vessel ... take the liquor boyling from the fyre & pour it into the vessel"

"take [lemmons] and put them in a vessel ... take the liquor boyling...& pour it into the vessel"

Your primary fermenter is likely plastic, so it'd be a bad idea to follow the directions literally and pour the hot water into it. Instead, drop the lemons into your pot, put a lid on it and allow it to stand somewhere to cool down.

Step 6: "put them into a vessel of fit bigness... when the liquor is almost cold... [add] good yest"

yest added

Hopefully your yeast has started frothing now. When the liquor is blood-warm, pour it into your fermenting vessel (lemons and all) and mix in your yeast.

Step 7: "when it hath done working, stop it up"

Now just leave it to go for a while. What the instructions mean here is that when it has done with the really super-frothy stage - you should transfer the liquid to your main carboy (without the lemons), and let it continue to ferment.

It's done when it's clear, and the recipe suggests you bottle it in sparkling-wine glasses with a small amount of sugar in each.

Friday 15 February 2013

Eleanor of Toledo Stockings - Part 1

I've been knitting since I was eight - when my Gran took me aside and taught me, to keep me occupied and out of my parents' hair when my first sister was born.

Since then I've knitted a fair number of things for myself and others... but I've done very little knitting for the SCA as yet because, given a choice, I generally prefer to try *new* things, rather than re-hash old ones.

However, I've never knitted myself any socks, and the nights at Rowany Festival are sometimes quite cold, so knitted stockings have been on my "festival TODO list" for some time...

My first idea was to make some Egyptian Knitted socks, and I've knitted up a sampler for that (which I'll write up and link to later), and hunted (for years) for some wool of the right colour, before finally giving up and getting a friend of mine to dye some white wool the correct shade of blue.

While that was happening, I thought I'd try some basic stockings, just to get the pattern shaped correctly and I bought some lovely bright red wool, and found myself a pattern for the Gunnister stockings (which are technically out of period, but just like those that are in period)...

And then I found these...

They are knitted silk stockings worn by Eleanora de Toledo in 1562

All I'd ever seen or heard of period knitting was that it was very simple, stocking stitch with some minor decoration around the ankle (known as "clocks"). I'd never seen *pretty* knitting, apart from the egyptian-style patterns... and I decided at once that I must make a pair.

I spotted the pictures on the Realm of Venus page Stockings of Eleonora de Toledo, 1562.

Apparently, the full-length, stretched-out version of the stockings (below) is a recent-addition to the world. They show that the stockings don't follow the usual European heel-turn method (of heel and foot flaps with a triangular short-row section, and, to my eyes, seem to indicate that the foot was knitted as a whole - with the instep being knitted as increases that makes the foot fit.

I chose to make mine in wool instead of silk, because a) it's cheaper and easier to get a hold of and b) it's more forgiving on fit...and given these are my first I can do with that small advantage... because basically I'm making it up as I go along.

As of February 2013, I haven't completed these (though I'm now most of the way through my first stocking), and I'll post pictures as I go.

Saturday 9 February 2013

Makshufa - Arabian almond-meal Halva

Not so long ago, I realised that while I do a lot of cooking, I don't have a very big range. Mainly I cook the same kind of pseudo-italian pasta-sauce-like things over and over in slightly varying degrees, with the occasional fusion-thai-style dinner for variety.

To kick that, and push my boundaries a little, I've been pushing my cooking comfort-zone. Partly with new mundane things (eg bread), but also with the occasional medieval dish - because why not?

Makshufa - what is it?

This dish is a medieval sweet-meat - an almond Halva, made from the Medieval Arab Cookery book (here pictured). This book combines a number of period arab cookery books and contains heaps of fantastic and tasty recipes - and I plan to cook a whole bunch of them in time.

The recipe is:

MAKSHUFA. Take equal parts of sugar, almonds (or pistachios), honey, and sesame-oil. Grind the sugar and almonds, and mix together. Add saffron to colour, mixed with rose-water. Put the sesame-oil into a basin, and boil until fragrant: then drop in the honey, and stir until the scum appears. Add the sugar and almonds, stirring all the time over a slow fire until almost set: then remove.

What I did

Ingredients

Ingredients:

  • sugar
  • almond meal
  • sesame oil
  • honey
  • saffron
  • rose water

You will need equal amounts of the first four ingredients - to make a small "loaf" of halva (see pictures below).

Equipment:

You will also need a heavy-bottomed-pot preferably a much bigger one than you'd need to fit the ingredients, as it will bubble and froth like crazy.

You will also need something onto which to pour the hot halva. I find that a lightly-oiled lamington tin is perfect.

I'd also recommend setting aside a couple of saucers for testing "done-ness" of the halva-mix during the toffee-making phase.

A big, heavy knife and a cutting-board are also good for cutting it into pieces. Do this if you think your halva will be fairly solid, as cutting it while it's still warm is much easier than when its gone solid.

Step 1: start the saffron

Saffron
Before
Saffron is ready
After

Saffron takes a little while to steep, allowing the colour to come out so I'll generally start it early. The recipe just calls for it to be added... but I'm quite certain that the cooks of the period would have realised that it was the steeped saffron, rather than the strands alone, that is to be added.

To prepare, put a very small amount of warm water into a bowl, and add a pinch of saffron. I also add the rose-water (just a half a teaspoon full) so there's a little more liquid without there being too much plain water.

Then leave it to one side while you do all the next steps - but don't forget about it!

Step 2: prepare your equipment

Getting your equipment ready early means you're prepared to quickly move to the next stage no matter what happens, and I find that in this recipe, things move quickly! So I prefer to have mine prepped and ready to go from the beginning.

In this case, you need your big pot on the stove, and your lamington tin very lightly oiled (a teaspoon smeared out to the edges works for me). Put the lamington tin in easy reach onto a heat-proof mat or trivet.

I'd also put two saucers into the fridge (for testing done-ness). Being cold makes it much quicker to test whether the hot toffee-like stuff is ready.

Put a knife and cutting board to one side for cutting it up while still warm.

Step 3: prepare the main ingredients

Mixing...

The recipe calls for pounding the almonds and sugar - but I cheated and just bought almond meal and table sugar. You can grind your own if you like - fresh-ground almond meal does have a much better flavour... but there's also something to be said for convenience. So at this stage, all I did was mix them together.

Meanwhile, in a pot I began to warm the sesame-oil. Once it's warm it will indeed begin to smell wonderfully fragrant - at this point you can pour in the honey. It's unlikely that modern honey will have very much scum - as mostly modern honey is filtered for all the bee-parts, pollen and wax. You will get a small amount of scum, which is the proteins of the honey. It's up to you whether or not you want so skim it off - it's in no way bad for you, and this recipe doesn't require crystal-clear clarity, so I'd just mix it back in.

Don't let it get too hot - leave it on a low simmer.

Step 4: Add the ingredients to the pot

Add the honey to the pot

When your oil and honey is nicely warmed and starting to simmer, it's ready for you to add your other ingredients. Don't let it be too hot, because it will burn the almond-meal. Just a light simmer will do.

Please be very careful when adding the other ingredients - they will cause the very hot, very sticky mixture to bubble and froth!

Add the almond meal/sugar mix, and the saffron/rose-water too; stirring quickly to get it mixed in well and not all lumpy.

Step 5: "stir it over the fire until almost set"

Settling down

The next stage is to just let it simmer on low, letting the sugars caramelise. Determining how long this should be is a black art, with the answer being "until it's ready".

You can tell it's ready if you drop a half-teaspoon-ful onto a *cold* saucer (from the fridge). If you tip the plate and it runs across the plate - it's nowhere near done. If it doesn't move at all it's done! take it off the heat! If it kind of gloobs over to one side, carefully push at it with a fingernail or spoon - it should feel like treacle - at which point, take the pot off the heat and go to the next stage.

Step 6: pour it forth

Pour out

Pour it out onto the lamington tin. Now and then, push at it with a spoon. You'll want it to be not too hot to manipulate, but you want to get to it before it goes too solid to play with.

The runniness can be deceiving... the picture at right is when it's just been poured out and it still too runny to move - it looked to me like it'd be way too soggy to cut, but this halva actually went nearly rock-hard when cool.

Step 7: roll and cut

Roll up
Roll it up
Slices of halva
and cut.

Roll it up, then cut it into bite-sized chunks and serve it forth. Enjoy.

I recommend keeping it in an air-tight container to maintain the texture.

Friday 8 February 2013

Who am I and what's the SCA?

My real name is Taryn East, and I'm a member of the largest Medieval recreation group in the world: the SCA[1].

What's the SCA?

We aren't a LARP[2] group, we don't dress up as elves and orcs. Nor do we recreate specific battles or personages of history (not there's anything wrong with any of the above... it's all lots of fun, just not what our group does).

Instead we study the arts and recreate the activites that were done back then. We have feasts, tourneys, balls, & wars; make our clothing, beer, pottery & knives by hand. We brew, sing, dance, cook, weave, & tell tales over an open fire.

It's a community where Honour, Chivalry and Service aren't just old-fashioned concepts, but living values that we teach to our children.

It's great fun, and I think you'd like it more than you'd think...

So, what's "Arts and Sciences"

Look back over that list of stuff we do. All of that, minus the martial activities, comes under the banner of "arts and sciences" (or A&S for short). So cooking, brewing, calligraphy, costuming, embroidery, smithing, shoe-making, weaving, spinning, dancing, and much much more. Anything they did back then is open season, and it's a veritable cornucopia of cool stuff to learn.

So what's this blog about?

So much cool things to learn. It'd be a shame not to share it with other people. I intend to put up pictures, explain what I tried - my successes and failures both, and ask for comments and advice on what I could do better.

Thus, this blog. I hope you'll come along and enjoy the ride with me.


Notes

[1] SCA stands for the Society for Creative Anachronism - it was a name made up on the spot by Marion Zimmer Bradley when the early group was required to give a name to book a venue... and despite it's strangeness, the name stuck.

[2] LARP stands for "Live Action Role Play" - where you get to dress up and use pretend swords, and usually a role-playing-game-like set of rules to battle it out and build a story. The SCA differs in that we don't play games in that sense. You don't roll dice to see who wins a sword-fight... you actually learn how to swing one and the person who does it best is the one that wins.